As a leader, you will always need a badge that requires little to no preplanning and could be done with items commonly found at home. There will be times that work is crazy busy, your daughter is in three soccer games, whatever – there will be a time when you look at the calendar and say “There’s a meeting tonight and I have NOTHING planned!” That’s where badges like this come in handy.
![]() The Movers Try-It is an active badge and can easily be done in one 90-minute meeting. The only thing that you need to keep in mind is that the badge is retired and therefore availability is limited. You will need to make sure that you can find the number of badges that you will need.
The Movers Try-It is an active badge and can easily be done in one 90-minute meeting. The only thing that you need to keep in mind is that the badge is retired and therefore availability is limited. You will need to make sure that you can find the number of badges that you will need.
Luckily several Facebook groups specialize in reselling retired Girl Scout badges. I’ve listed a few here:
- https://www.facebook.com/groups/badgeswap/
- https://www.facebook.com/groups/271865442952318/
- https://www.facebook.com/groups/girlscouttreasurehunters/
Now, on to the badge. Try-Its only required four steps to complete, and I’ve detailed five for you to choose from. This can easily be done while camping so that the girls can use their newfound creations outside and be active.
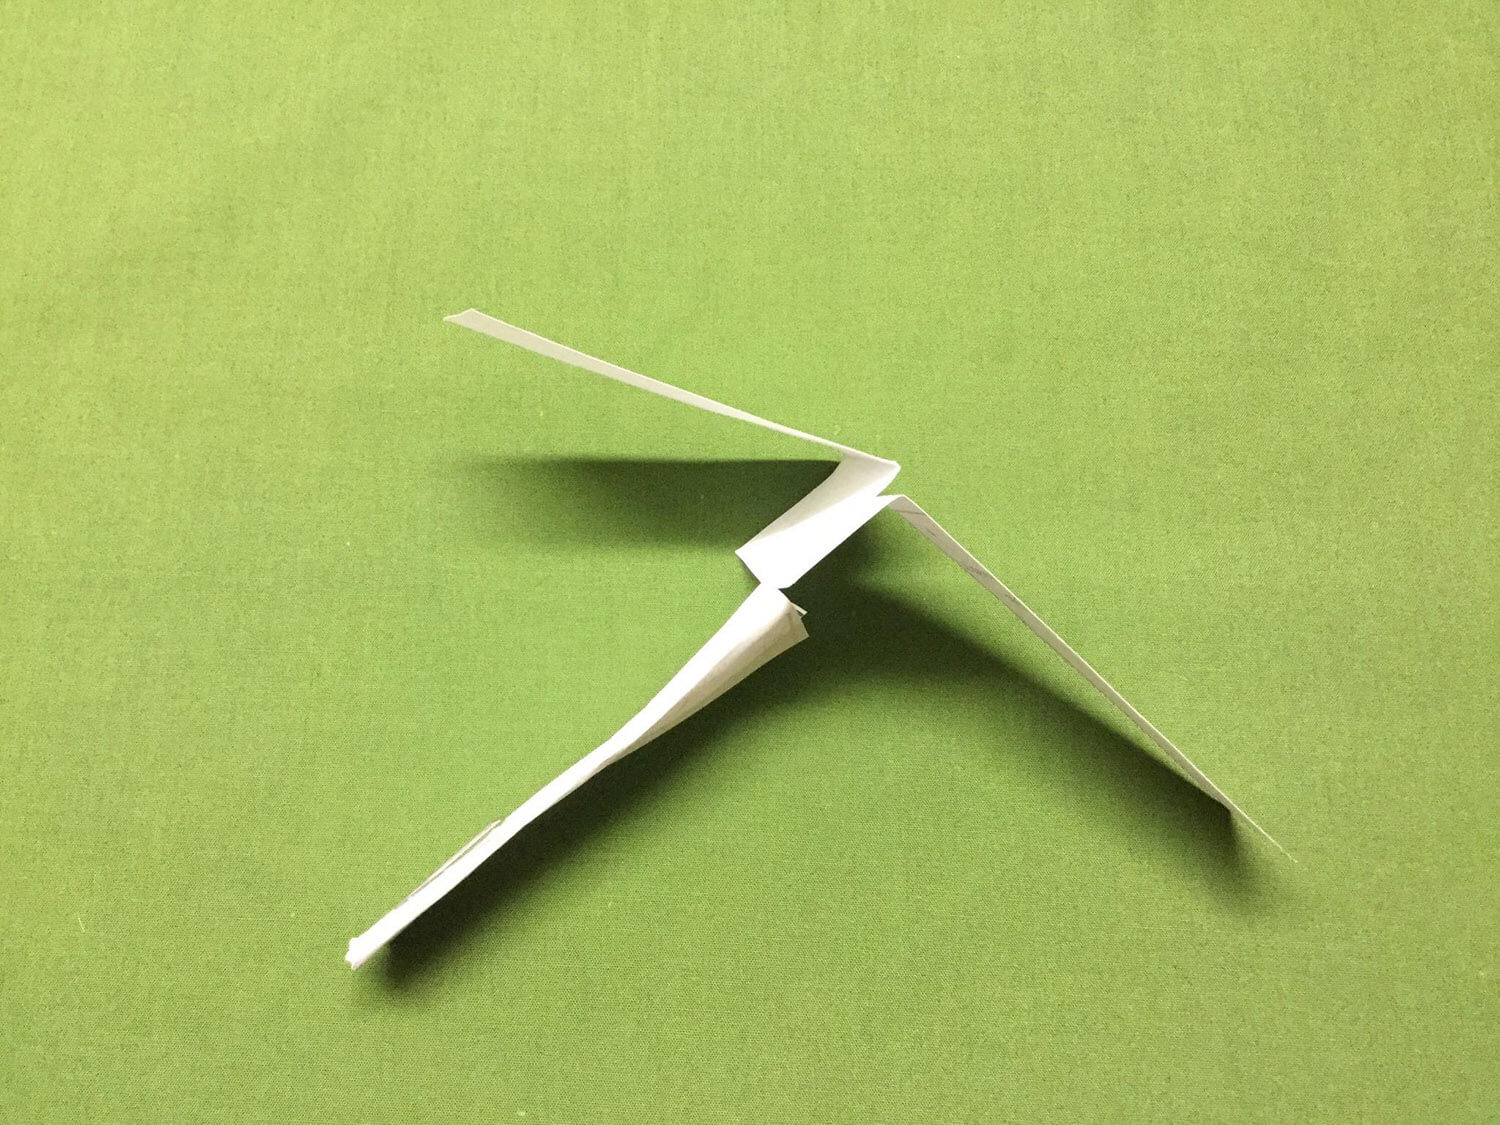
1. Ring Glider – watch your creation smoothly glide through the air
Items Needed
- Paper (either printer paper or construction paper)
- Scissors
- Plastic straw
- Cellphone tape
- Ruler
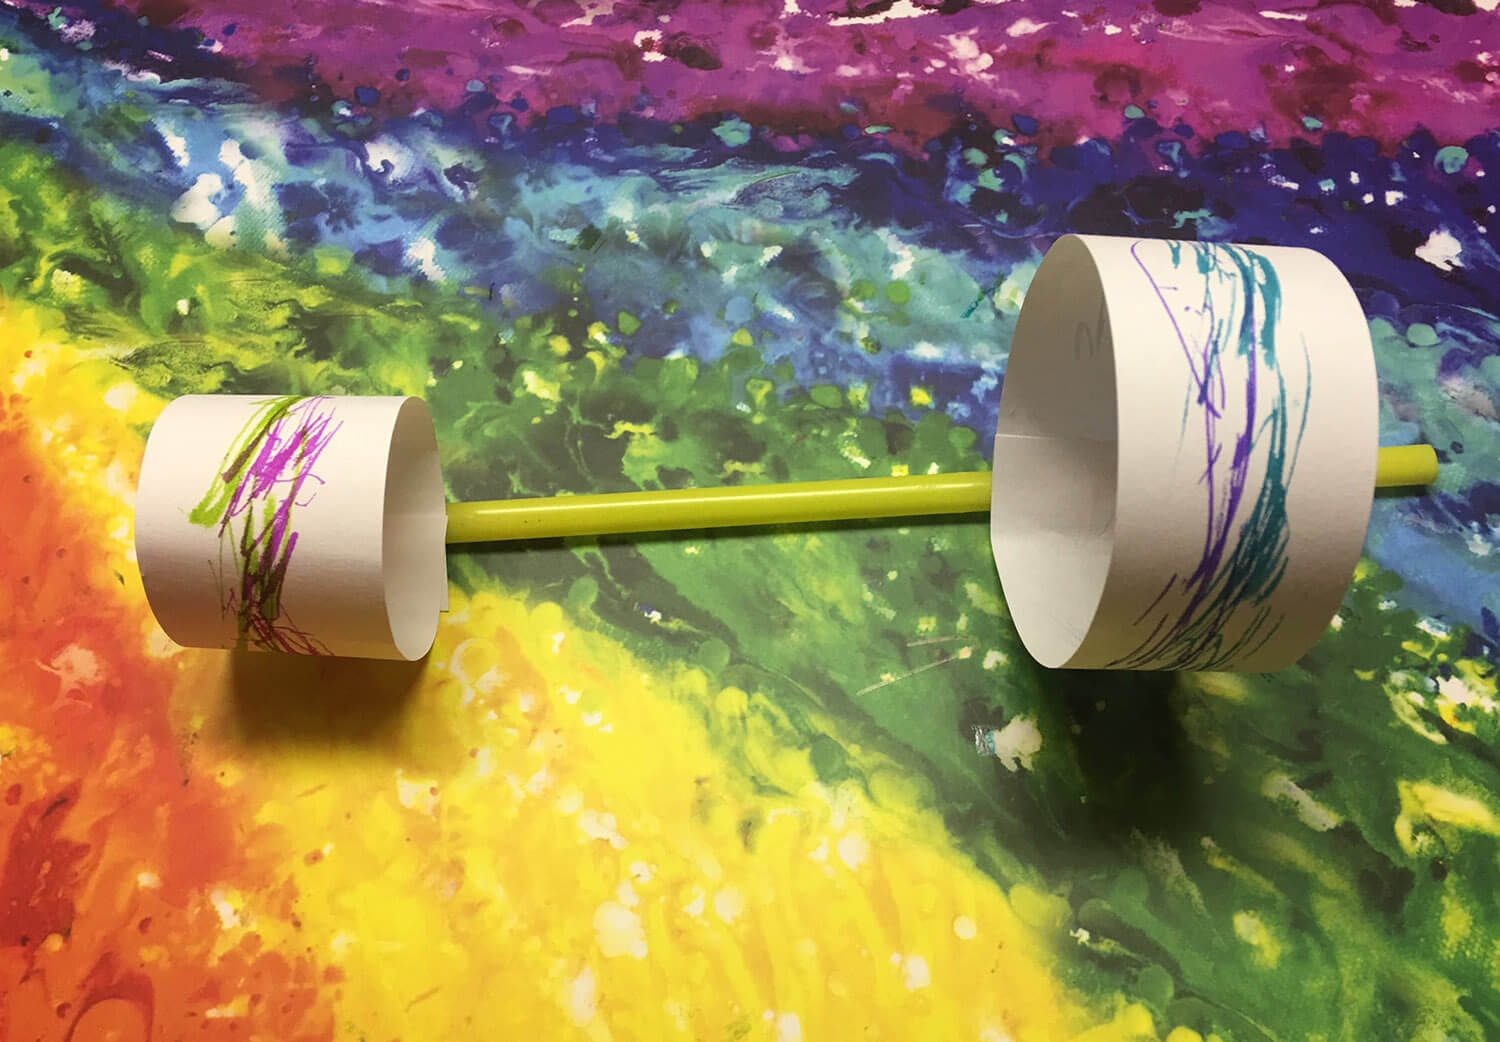 1. Use the ruler to measure two sections: The first is 7″ x 1″ and the second is 5″ x 1/2″. You’ll then need to use the scissors to cut each section out.
2. Use the tape to take each strip and make it into a circle by taping the ends together. I overlap them a little bit (1/2″ to 1″).
3. Now take the plastic straw and attach the two curled strips at each end by inserting the straw inside the overlap of the circles. You need to make sure that the paper is stiff enough to keep the structure of the circle. You will probably need to apply some tape on the inside of the circle to make sure the straw is secure.
4. Now release your glider into the air. If it was made correctly, it should fly anywhere from 3-6 feet.
2. Paper Copters – Make your own whirlybird
Items Needed
- Paper printed with helicopter pattern on it
- Scissors
- Pencil
- Paper Clip
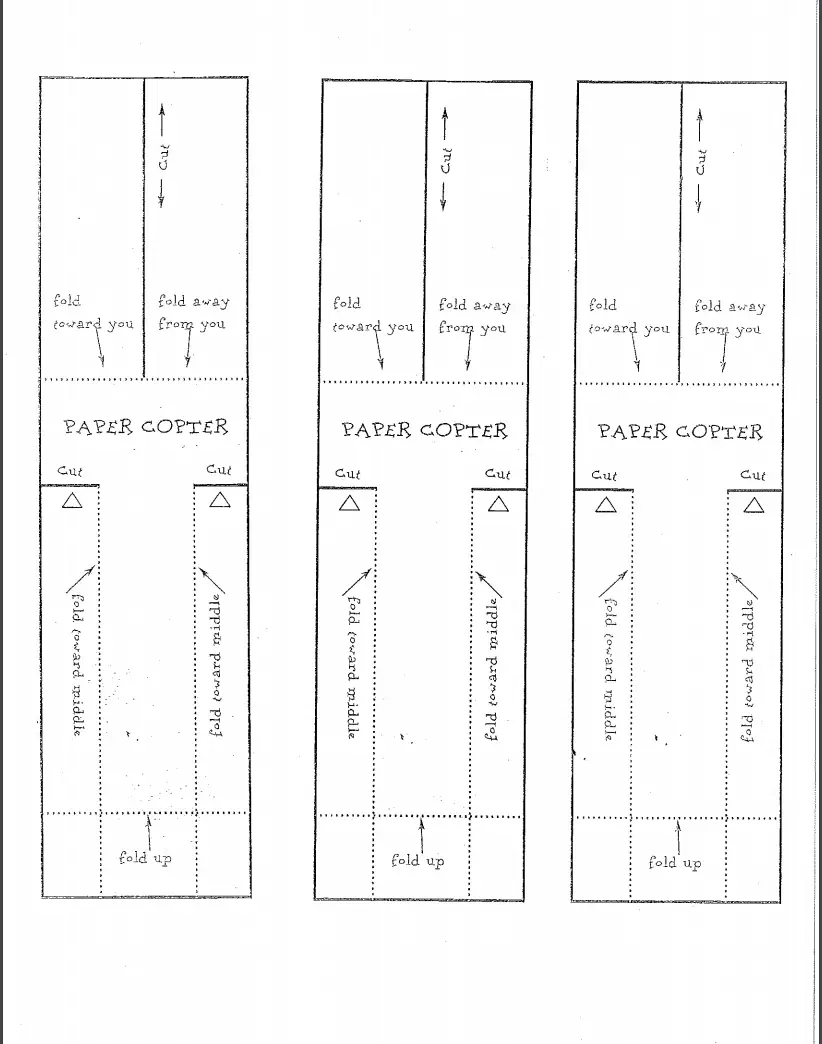
Printable cutout
1. Have the girls take the helicopter pattern and cut along the solid lines.
2. Now you need to fold these two blades in opposite directions using the dotted lines.
3. Next, you will need to take the sides and fold them also along the dotted lines but toward the middle.
4. Finally, you will take the remaining bottom section and fold it along the dotted lines as well.
5. Take the paper clip and attach it to the bottom of your helicopter.
6. Your helicopter is ready for launch! Drop from a point as high as you can and see it spin.
3. Windsock – Curious about which way the wind is blowing?
Items Needed
- Colored Construction Paper
- Tissue Paper Streamers (different colors)
- String/Yarn
- Crayons/Markers/Stickers
- Ruler
- Scissors
- Glue (Glue stick is fine)
- Masking Tape
- Stapler
1. Have the girls decorate one side of their construction paper with the crayons, markers, and stickers.
2. Glue the ends of the construction paper together to make a ring similar to the glider above. Don’t forget to overlap the edges a little bit and make sure the decorated side is on the outside.
3. Cut about 6-8 two-foot lengths of tissue paper streamers in various colors and staple them to the inside of the construction paper ring.
4. Finally, take about a 2-3 foot length of string or yarn and tape/staple to each side of the ring to make a handle. I used tape and then a staple on top to secure the string because several of the girls pulled their string out.
5. Your windsock is ready to use at home or camp. Have the girls get in a circle and walk quickly pulling their windsocks to see them in action.
4. Weather Vane Dance – Become one with the wind!
Items Needed
- Tissue Paper Streamers (different colors)
- Scissors
- Masking Tape
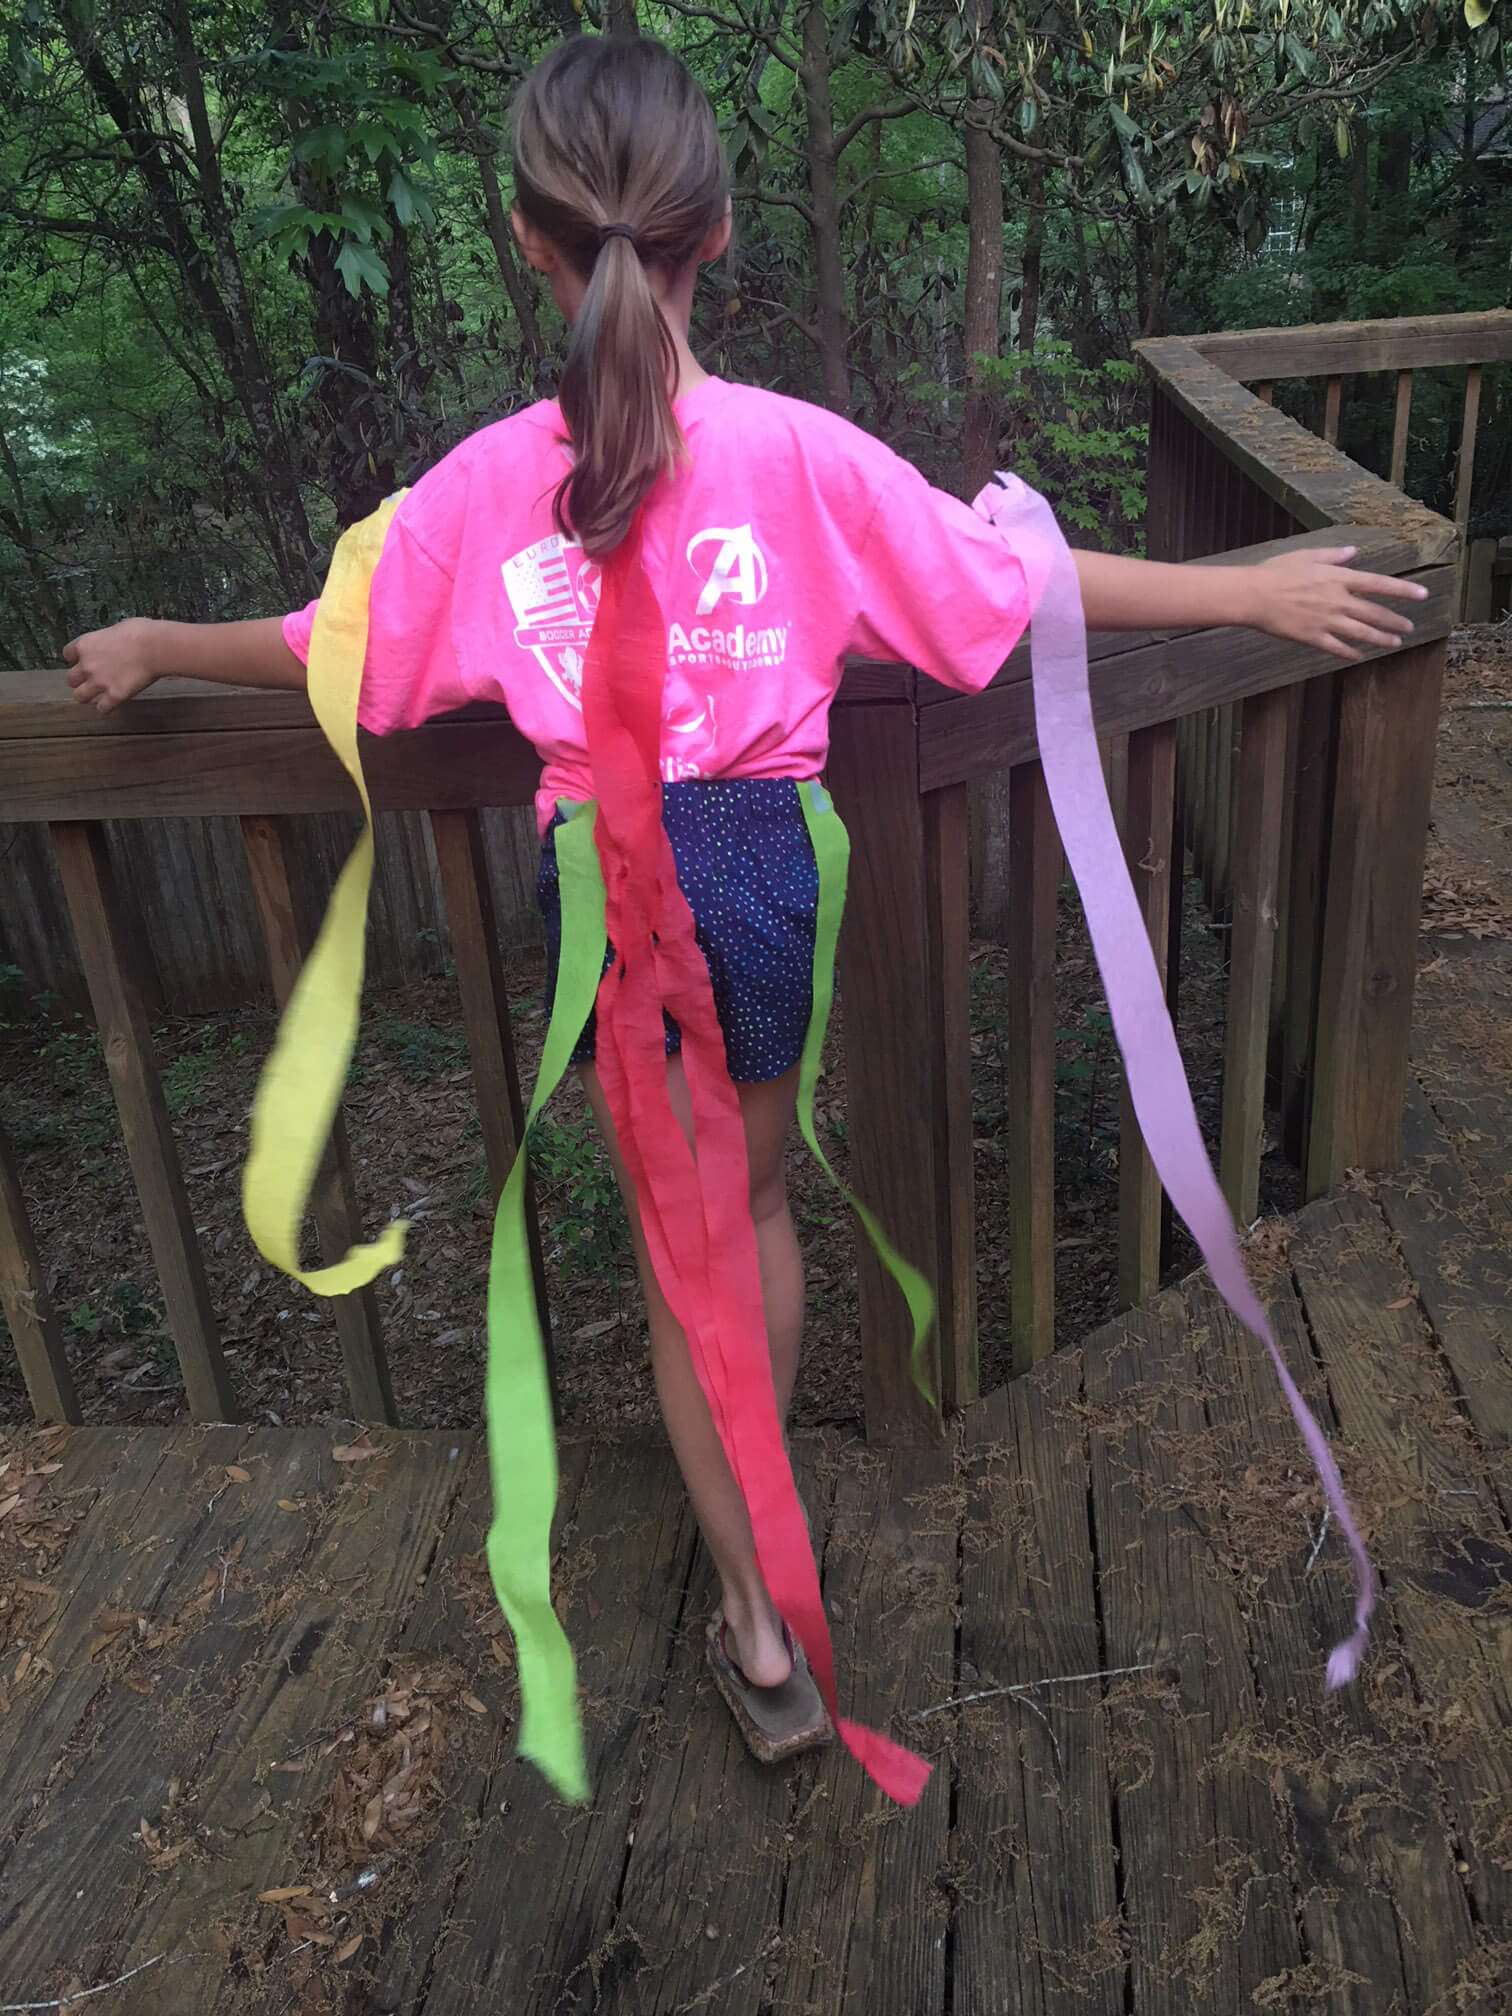 1. Cut about ten lengths of 2-3 foot tissue paper streamers.
2. Use the masking tape and attach them to the girl’s arms, legs and side.
3. Have the girls stand in the wind and watch how the streamers move. Have them twist and turn to see how things change. If there is no wind, you can have the girls run with their arms outstretched to see the streamers move.
If you have the time or you are doing this badge while camping, you can add or substitute the step below for more fun!
5. Lunch bag kite
Items Needed
- A small paper bag used for lunch
- Tissue Paper Streamers (different colors)
- String/Yarn
- Crayons/Markers/Stickers
- Hole Punch
- Scissors
- Tape/Stapler
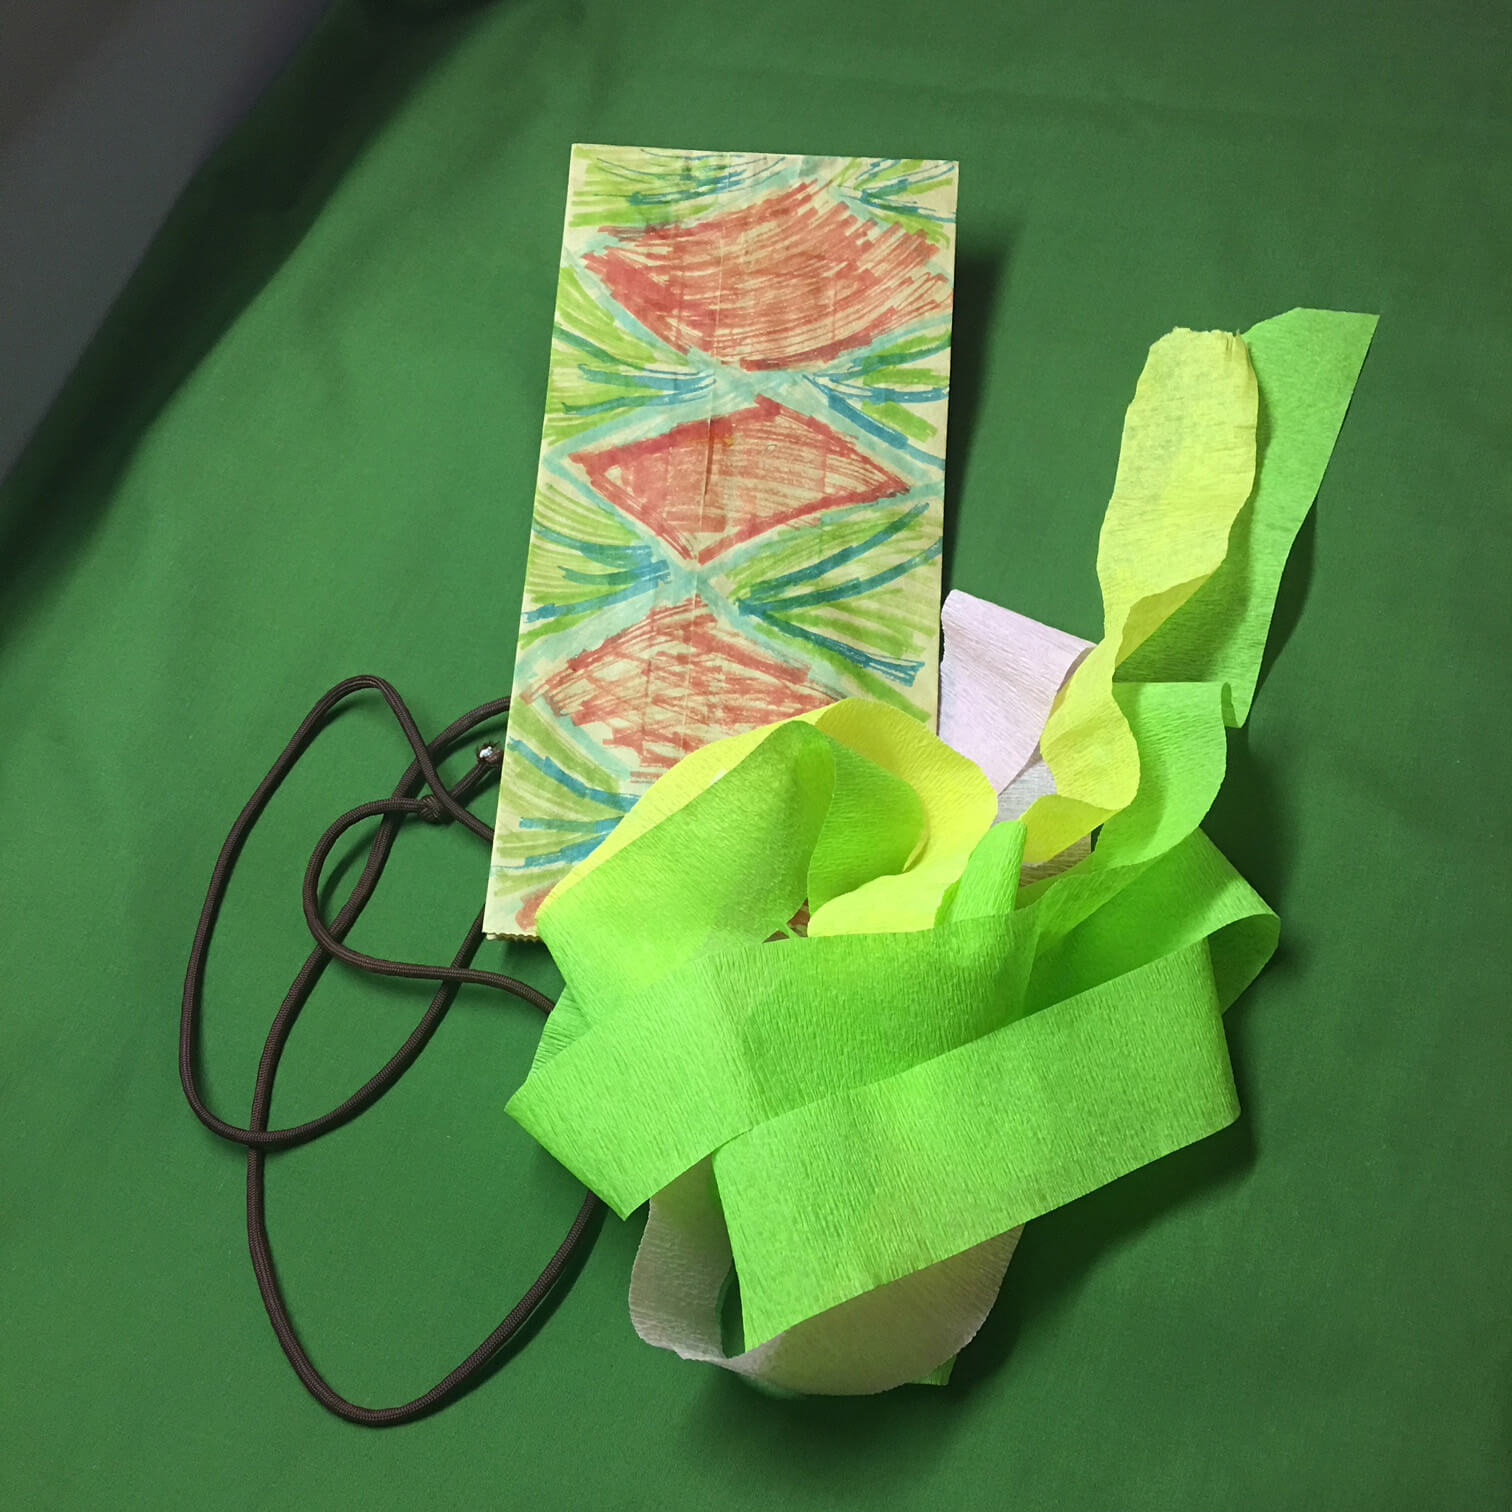 1. Have the girls decorate their bag. Have a wide choice of bold colors and stickers available.
2. Cut several long strips of streamer about a foot long and attach them to the open end of the lunch bag using either the tape or the stapler.
3. Use the hole punch to either (a) punch a single hole in the center of the bottom of the bag or (b) punch four holes in the corners of the bottom of the bag.
4. Strengthen the holes by placing tape on either side of the hole(s) and then punch another hole through it.
5. Thread the yarn/string through the hole(s). You may need to use a stick or something similar to brace the kite.
6. Your kite is ready to fly through the air!
Let me know how this badge worked for you. Comment below and give me the details!
Related Posts
-
Learn about the retired Brownie Try-It badges for brownie girl scouts. You can still earn…
-

Here are five fun games that you can use to earn the Around the World…
-
This is a fun badge that my Brownies have always enjoyed. As a leader, I…